June 29, 2015
Mani Monday: Neon Pink (Guest Post)
Hello, I'm Sarah from Workaday Ramblings. Sam is letting me take over today to share some nail art.
I love doing nail art looks, but often find myself feeling lazy and wanting to do something simple. The result this time is a pink look with a few accent dots.
June 28, 2015
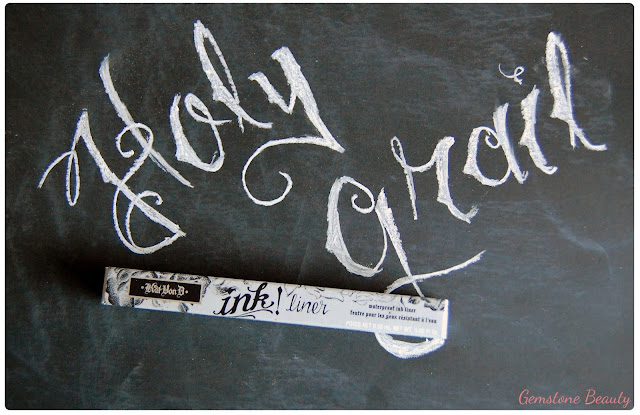
My Holy Grail Eyeliner: Kat Von D Ink Liner in Trooper (Review)
The Holy Grail product. Everyone wants to find their Holy Grail product. For some, it takes years; for others, it can take a few months.
I am proud to say, that after several years, I have found my Holy Grail black liner: Kat Von D's Ink Liner in Trooper.
I am proud to say, that after several years, I have found my Holy Grail black liner: Kat Von D's Ink Liner in Trooper.
June 22, 2015
Mani Monday: Nautical Nails
It's officially summer and I recently attended a nautical themed Stag & Doe, so of course I had to do my nails!
June 21, 2015
A Personal birthday gift: Origami Owl Living Lockets
I have now entered the last year of my 20s. I have spent a great weekend with family and friends and received some really touching gifts.
One said gift, is a necklace and bracelet from my parents & younger brother, from Origami Owl. I've never heard of this company until the moment that my family presented me with these cute little take-out boxes.
June 15, 2015
Mani Monday: Father's Day NailArt (Guest Post)
Hey Everyone!
It's Miranda, from Miranda Loves and this year, Samantha's letting me use my love of polish and creativity talent to guest post for her Mani Mondays to show a unique Father's Day nail.
I used a toothpick to create the art on my nails as dotting tools would have been too big.
It's Miranda, from Miranda Loves and this year, Samantha's letting me use my love of polish and creativity talent to guest post for her Mani Mondays to show a unique Father's Day nail.
When I was planning
what to do, I thought, Father's Day - most people will either draw a
tie, or a golf course on their nails. I admit, I was almost leaning
towards drawing a tie as an accent nail, but I wanted to be more
creative and I got to thinking...My favorite memories with my dad are
when we would go travelling.
Together with my
mom, we have traveled to many countries/cities including, but not
limited to, Rome, Israel, Egypt, Paris, London, Hong Kong, China, to
name a few. To cherish these moments, I decided to come up with a nail
art centered around travelling.
Products Used are:
1. Chanel - Summer 2015 Limited Edition in Vibrato
2. Tenoverten - Ludlow
3. Nails Inc - 45 Second Caviar Top Coat
3. Nails Inc - 45 Second Caviar Top Coat
4. Essie - First Timer
5. Pure Ice - White
I used a toothpick to create the art on my nails as dotting tools would have been too big.
Thanks Samantha for hosting me! I look forward to all our collabs to come :)
Until next time - XO, M.
June 14, 2015
Review: Powdered face mask by Zakia's Morocco
Nothing is quite as relaxing as sitting down with your feet up, a glass of your favourite drink and a face full of mud.
Facial masks are part of my regular beauty routine (usually done weekly), but since I had to test out a new mask, I did it twice a week. The perfect excuse to take a bit more "me" time.
Up until recently, I've never heard of "ghassoul" (or rhassoul). Ghassoul is a natural mineral clay found in Morocco. Moroccan women have been using this clay for centuries on their face, body and hair. Found in a variety of products sold by Zakia's Morocco, ghassoul has several benefits including softening the skin, tightening pores and dandruff prevention.
I mentioned that women use it in their hair, but forgot to say that some use this as a substitute for shampoo. Not my cup of tea, but worth a try for those that go "-poo" free.
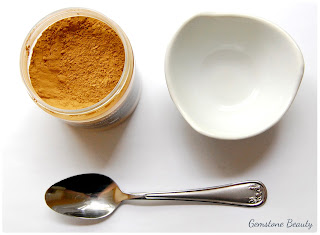
I've mixed in a little of the Moroccan Ghassoul Clay Powder by Zakia's Morocco with equal parts shampoo, and didn't notice much difference. You can also mix the powder with a bit of water to create a smooth paste, which can be used as a hair mask or a face mask.
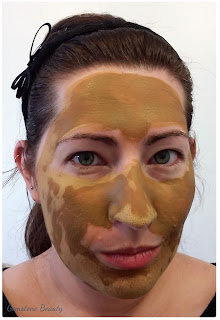
As a face mask, the Moroccan Ghassoul Clay Powder applies smoothly with a brush (I like using an old foundation brush) and dries within about 5 minutes. I let it sit for about 10 minutes in total. You can see that it draws out the oils that are on my nose.
Once rinsed away with warm water, my face is left feeling a little dry, which is a first for me. After several minutes, moisture seems to go back to how it would normally be after a clay mask, but my skin still didn't feel as baby-smooth. I never noticed any other effects.
While I wouldn't use Zakia's Moroccan Ghassoul Clay Powder as part of my regular facial masks, I might use it if I'm feeling a little extra oily in the summer.
*Product was provided in exchange for an honest review.
June 13, 2015
Guest Post: Rocking the Neon Trend
Hi there!
I'm Chantal from Chantal's Corner and I'm excited to be a guest for Samantha as part of the Canadian Beauty Bloggers' monthly guest posts! Our theme this month is neon so I did some crackled neon nail art for you.
I saw someone do some very similar nail art not too long ago and that was my inspiration for this post. Unfortunately I don't remember where I saw this.
Here are the products I used:
I started off with a coat of Sally Hansen Xtreme Wear "White On" as a base so the colours would be as bright as possible. I then added spots of colours on the nails so that all the white was covered. After that I added Sally Hansen Big Crackle Top Coat.
At this point I did not like my nails at all and was not going to use them for my guest post. I was actually hating how they looked. The crackle polish had a very flat and dull finish to it and the colours underneath weren't popping through as much as I hoped they would. So I decided to add some China Glaze "Fairy Dust" cause that's my go-to to fix nail art I'm not too fond of. As soon as I added a coat of Fairy Dust the black became a nice deep black and the colours really popped through - I was SO happy! I then finished it off with a coat of CND Vinylux Weekly Top Coat and my nails were done!
This was my first time using a crackle top coat and I'm glad I researched it a bit before using it. It dries REALLY fast so don't even bother wiping some polish off the brush like you would with a regular nail polish, just dip it in and use it all.
You can tell that it applied a bit thicker on my middle finger because the crackle pattern is different than on the other fingers (more square-ish and less linear).
It's too bad that the camera does not pick up on the glitter of Fairy Dust because it's so sparkly in real life. On camera it just looks like mini grey glitters.
This was my first time using a crackle polish and I love the effect that it gives! Even my husband loves it and said it's one of my best nail art so far. I'm SO happy with how they turned out and I hope you like them too. :-)
Thank you Samantha for having me as your guest today!
- Chantal :-)
I'm Chantal from Chantal's Corner and I'm excited to be a guest for Samantha as part of the Canadian Beauty Bloggers' monthly guest posts! Our theme this month is neon so I did some crackled neon nail art for you.
I saw someone do some very similar nail art not too long ago and that was my inspiration for this post. Unfortunately I don't remember where I saw this.
Here are the products I used:
- Sally Hansen Xtreme Wear "White On"
- Sinful Colors "Innocent"
- China Glaze "Shocking Pink (neon)"
- NYC Long Wearing "Times Square"
- BK Kitty "#28"
- Sally Hansen Big Crackle Top Coat
- China Glaze "Fairy Dust"
- CND Vinylux Weekly Top Coat
I started off with a coat of Sally Hansen Xtreme Wear "White On" as a base so the colours would be as bright as possible. I then added spots of colours on the nails so that all the white was covered. After that I added Sally Hansen Big Crackle Top Coat.
At this point I did not like my nails at all and was not going to use them for my guest post. I was actually hating how they looked. The crackle polish had a very flat and dull finish to it and the colours underneath weren't popping through as much as I hoped they would. So I decided to add some China Glaze "Fairy Dust" cause that's my go-to to fix nail art I'm not too fond of. As soon as I added a coat of Fairy Dust the black became a nice deep black and the colours really popped through - I was SO happy! I then finished it off with a coat of CND Vinylux Weekly Top Coat and my nails were done!
This was my first time using a crackle top coat and I'm glad I researched it a bit before using it. It dries REALLY fast so don't even bother wiping some polish off the brush like you would with a regular nail polish, just dip it in and use it all.
You can tell that it applied a bit thicker on my middle finger because the crackle pattern is different than on the other fingers (more square-ish and less linear).
It's too bad that the camera does not pick up on the glitter of Fairy Dust because it's so sparkly in real life. On camera it just looks like mini grey glitters.
This was my first time using a crackle polish and I love the effect that it gives! Even my husband loves it and said it's one of my best nail art so far. I'm SO happy with how they turned out and I hope you like them too. :-)
Thank you Samantha for having me as your guest today!
- Chantal :-)
June 10, 2015
Skinny Teatox: My experience with this weight loss aid
I'll admit, I've gained some weight over the past few year and I've been wanting to get rid of the extra weight.
I don't believe in "diets" because those are often short-term solutions that are un-healthy and the results don't last. Did I mention that I'm also a very picky eater? It's actually quite bad. Anyways...What I do believe in, is a lifestyle change and incorporating or altering small things that I may already do to help get me the results I'm looking for.
You can't do it all at once (ok, maybe some can). It's often too hard on your body and you're more than likely to go back to your old habits. Have a small craving? Treat yourself at the end of the week or a little bit here & there. Don't deprive yourself completely; you'll be more likely to binge when you do break.
So when I heard about Skinny Teatox and had the opportunity to try their 14-Day Skinny Teatox, I decided that this was something that fit nicely with my beliefs and this could be a good boost. I drink tea on a regular basis, so changing my tea was a piece of cake.
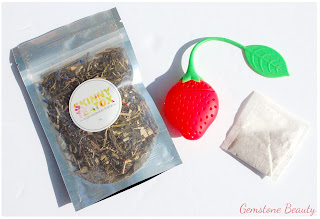
Skinny Teatox is a 100% natural tea based detox program that helps with weight loss and good health. The 14-Day Teatox includes 30g of Morning Tea and 7 sachets of Evening Tea.
Morning Tea is supposed to help with weight loss by, increasing metabolism, increasing energy levels, suppressing appetite and burning calories. This is to be taken daily in the morning or early afternoon.
The Evening Tea, which is taken once every other evening, contains senna which is one of the ingredients that help detoxify and cleanse your colon. (In other words, this acts a bit like a laxative)
I found the Morning Tea reminded tasted to be green tea based. It was delicious. I usually drank the tea between 10:30am and 11:30am during the week. On weekends, my schedule's a little off and I'm not in the habit of drinking tea. By the time I'd remember, I was already quite warm and doing house and yardwork, so I'd make myself a cup and stick it in the freezer for about 30 mins to make myself a cool refreshing ice tea!
The first day, I realized that I didn't feel so drowsy in the afternoon after my lunch. On the second day, after work I felt like I had a little more energy than I usually did. So I started incorporating regular walks after work, which my dog loved (helps that the weather's getting better too!)
After the first week, I realized that I wasn't as hungry when it came to dinner time. I often didn't get hungry until about 7pm and I only ate about half of what I'd normally eat. My stomach wasn't growling during the day. I'd have my breakfast which was usually a bagel in the morning, then I'd have an apple or carrots & celery sticks mid-morning. Around 2:30, I'd usually have the apple or carrots & celery sticks that I didn't have earlier then I was good until dinner. Of course, there were some days where I only had 1 between-meal snack.
The Evening Tea and I didn't get along so great. Steeping time is between 2-4 minutes for both teas. The first evening I tried the tea, I steeped for the minimum of 2 minutes. The tea had no effect on me. Two days later, 4 minutes. The following morning I had painful cramps and had to unfortunately spend about 1 hour in the washroom. Two days after that, I tried for 3 minutes, and no affect. This was a little annoying for me as it was one thing or the other - no in betweens. I allowed myself one more morning of cramps (made sure it was a weekend) to see if it would make a difference since I had been on the Teatox for nearly a week at that time. No difference. Now, I will say, we're all different. Everyone's body will react differently to this Evening Tea and I know plenty of people who have had a tea that contains senna and they did not have the cramping.
So I have taken the 14-Day Skinny Teatox, started incorporating regular evening walks and switched out my granola bars for carrots & celery sticks (I'll be honest, I do love carrots & celery sticks!). I don't know exactly how much weight I've lost since I don't own a scale, but my pants and shirts now fit a bit more comfortably.
The 14-Day Skinny Teatox is currently selling for $32 (normally $42) and can be purchased at skinny-teatox.com. This Canadian company (yes, CANADIAN) ships worldwide (except for Australia) and usually takes about 4-8 business days if shipping within Canada via regular mail.
I'm not going bikini shopping anytime soon, but I'm confident that I'll get there. I don't plan on doing the whole teatox again, however I do plan on getting the 14-day supply of the Skinny Teatox Morning Tea a few more times in the future. I might also try their Fat-Free Chocolate Energy Tea.... Mmmm.
*items were provided in exchange for an honest opinion.
June 08, 2015
Mani Monday: Baby Blue Nails
Went to a friend's baby shower last weekend and wanted to do my nails based on that. Since she's having a baby boy, I decided to go with blue nails with a little something extra.
Using Blu by Zoya as my base colour, I then stamped some cute baby pins from my Cici & Sisi stamping plate on my ring fingers and middle fingers. I didn't want them to pop out, but be a little more subtle, so I decided on using OPI Alpine Snow, Julep Claire and Ceramic Glaze Santorini Blue.
The end result were baby blue nails that everyone thought were cute (and a few who laughed at me for theme-ing my nails, oh well!)
Hope you enjoyed!
June 01, 2015
Introducing... Mani Monday
Welcome to Mani Monday!
I'll be honest, I'm not the greatest at doing nails, however that doesn't stop me from trying! I'm constantly looking at nails on Instagram or Pinterest and everything is so gorgeous. I don't have beautiful, long, strong, healthy nails like some of these ladies do, but I'm going to take their pics as inspiration and give you a new manicure every week! Over the next few months, you'll also notice a few guest bloggers sharing their nails as well!
I hope you enjoy!
I've been experimenting quite a bit with stamping, and this was my first manicure that I was
I used Nail HQ Ridge Filler as my base, CND Vinylux in Reflecting Pool, a gorgeous one-coat cream blue and OPI Alpine Snow for the white.
Using the Born PrettyBP-17 stamping plate, I applied OPI Alpine Snow, scraped it off the access, stamp onto the stamper then stamp onto the nails. Finish it off with a topcoat.
I was quite happy with this design and received a few compliments at work. Mission accomplished!
Stay tuned to next week!
Subscribe to:
Comments (Atom)


