You can view the nail items review here.

I received the Revlon Photoready Primer + Shadow in Metropolitan. The colours are quite nice. Before applying it, I tested the colours on the back of my hand using the provided primer and my go-to primer (Urban Decay Primer Potion).

The provided primer was more like a very smooth, shadow. Wasn't very creamy at all. The colours popped a lot more when used with the UD primer. I find the main colour to be quite dark with UD - just too dark to be used all over the lid for an everyday look. The middle colour, a sparkly grey-ish colour is nice. I really like it, however the texture wasn't the greatest. Because it contained some sparkle to it, it was a little flaky, but not too bad. The brow bone colour is great. No complaints there. The last colour is the brown/gold sparkle (glitter) topcoat. This was messy, lots of fall out. It really just lightened things up a little by giving it some sparkle - nothing too noticeable. Like I said, messy more than anything.
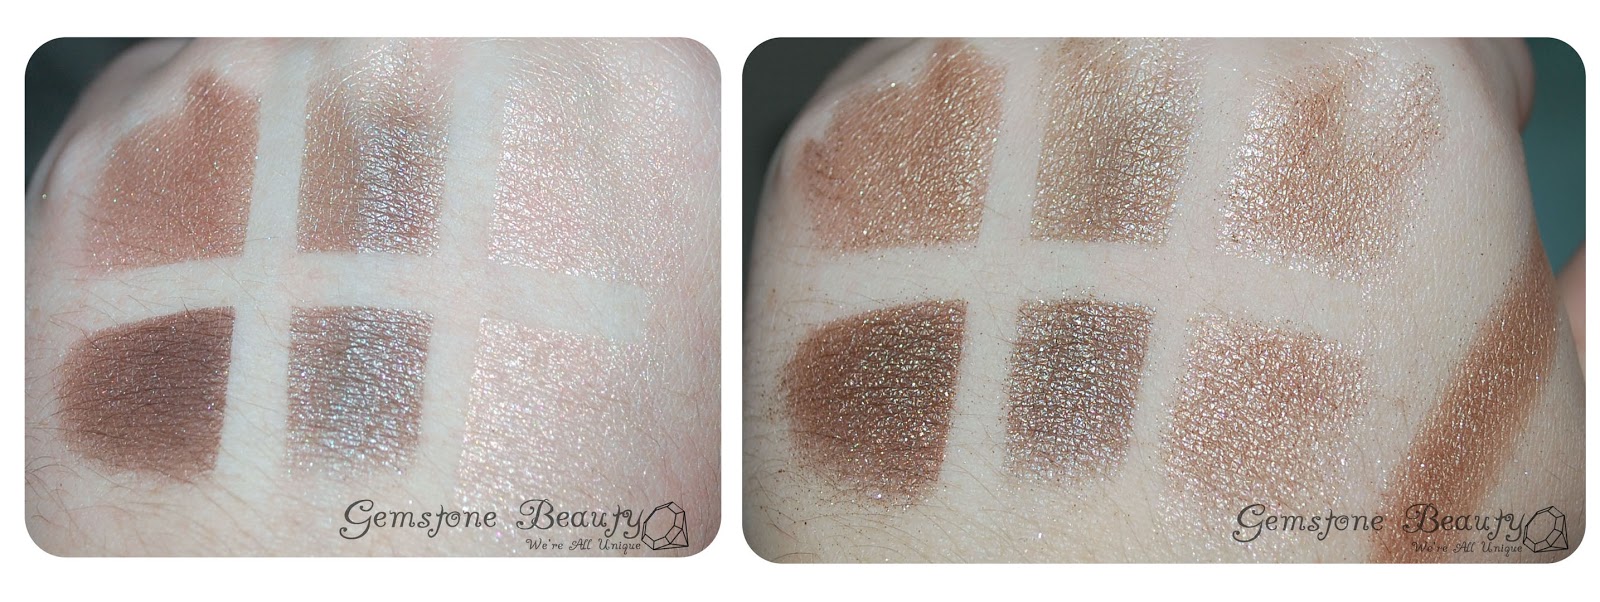 |
| Top with provided primer, bottom with UD primer. Left: the regular colours, Right: the colours with the glitter topcoat added |
 |
| Left: No glitter topcoat. Right: With glitter topcoat |
I decided to do two looks. The first is using the order of how they have the colours placed and the second is using the brow bone colour all over, the middle colour in the crease and the darker colour as a liner. I then added the topcoat to the darker colour for both looks. You can actually see in the picture below the fallout I got from applying the glitter topcoat. Best applied wet.
 |
| Left: No glitter topcoat. Right: With glitter topcoat |
After a few hours of sitting around the house, it started creasing which completely sucked. My go-to primer is usually Urban Decay, however the dark colour turns up too dark. The primer colour does look great on it's own though.
My overall thoughts: The actual shadows of this palette work well together. The bottom part of the palette (the primer & glitter topcoat), are not that great. I would use this as a backup in my car for those days that you leave the house without makeup and suddenly something important comes up and you wish you had something. It'll last that short time perfectly, otherwise, bathroom for touch ups! Just be sure not to use the glitter unless you have access to use it wet.
*hugz*
-Sam
Great post! I wasn't overly thrilled with the palette..I find that the dark brown doesn't blend in well and it looks patchy!
ReplyDelete